


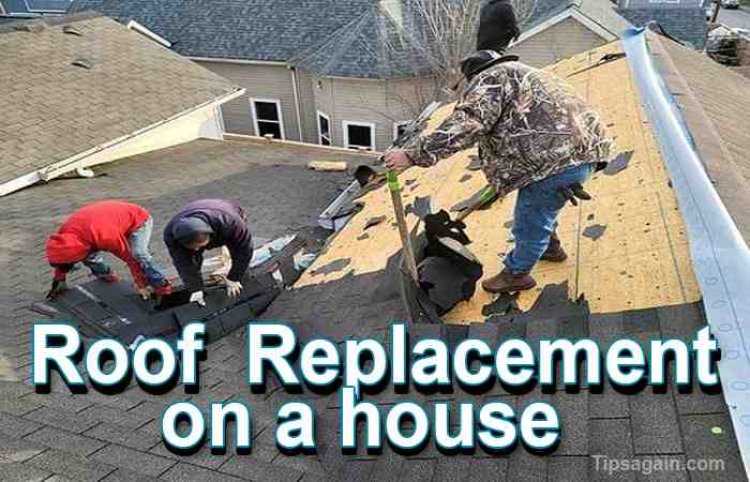
Roof Replacement
tips again you Learn what to expect for a roof replacement. Prepare yourself for a project or hire a roofing Replacement
Roof Replacement
- 1. Setting Up for Your Roof Replacement
- 2. Clear Away Old Roofing Material
- 3. Change Out Old Flashing
- 4. Put Down the Underlayment
- 5. Installing the New Roof
- Other: The Valley Flashing Goes Underneath
- Decide What to Leave up to the Roofing Contractors
Replacing a roof on a house is a tedious yet necessary interaction for the vast majority, as each roof has an expiration. At the point when that day comes to replace your roof, it is important you realize what steps take care of business appropriately. Regardless of whether you will employ a roofing contractor to take care of the work for you, you'll in any case want to know what they will do all through the cycle, so you know what to anticipate. Here are the basic strides for roof replacement
1. Setting Up for Your Roof Replacement
Assuming you have an asphalt or other disposable roof, you will require a trash container nearby. On the off chance that you are eliminating metal roofing you will want a place to store it until you can sell it as scrap or reuse it
Get the garbage container set up as near your home as conceivable and lay out some drop cloths around the bottom of the roof to safeguard against any accidental drops that you make. Presently set up a progression of roof jacks along the bottom of the roof holding 2×10 boards to catch slipping shingles and individuals. Purchase a safety harness and secure it to the peak of the roof to hold yourself back from falling off during your roof replacement.
2. Clear Away Old Roofing Material
One of the main parts of installing another roof is taking off the old one. On the off chance that it is an asphalt shingle roof you should push a shingle fork underneath the shingles and pry them upward to twist the roofing off. Start at the top and work your way down. Eliminate the edge cap shingles first and start sliding the fork underneath each column of shingles and prying them up until they are free. Put the eliminated shingles into the garbage and gradually work your way down until you eliminate all the shingles effectively.
To eliminate a metal roof, utilize a regular pry bar-or drill on the off chance that the screws are not too weathered-to pry free the easterners holding the panels in place. Eliminate the edge cap and gradually eliminate all the fasteners in each panel in turn working your way from one side of the panel to the other. After the panel is totally unfastened pull it off and put it down on the ground. Proceed with this cycle until all the panels are taken out during your roof replacement.
fter you eliminate all the roofing and underlayment, walk around the bottom of your home and clean up the removal trash to guarantee you have easy access while installing the new roof
3. Change Out Old Flashing
Review the flashing on the roof after you have all the roofing cleared away. Flashing(usually aluminum or galvanized steel) is installed over joints on the roof to forestall water seepage. This incorporates the trickle edge and any of the flashing at the roof's valleys, vents and chimney stack. If needing replacement, add excellent flashing in place of the old and seal it appropriately to keep water out.
To do this you should take a gander at how it was installed beforehand and imitate what was finished. Various areas require different flashing. Stacks need step and counter flashing as well as a cricket in many instances. Vent boots should be looking great and valley flashing shouldn't have any cracks or rust. Generally, you ought to always replace the valley flashing. This turns sour before the rest, because it takes the most abuse. After all the flashing is repaired or replaced the time has come to put the new roofing down, starting with new underlayment.
4. Put Down the Underlayment
Underlayment has a valuable job in the health of a roof. Because even the best laid roof will give a touch of water access behind it, the underlayment catches that water and sheds it so the sheathing and framing underneath don't get damp and decay.
The initial step of putting down underlayment is laying an ice and water barrier, in the event that it isn't already there. Put this down below the trickle edge for added security to your roof replacement. This could mean pulling up dribble edge to install it and then fastening the current trickle edge back down indeed. Nail the ice and water safeguard down along the edge of the roof for added strength, and then start installing the underlayment that you picked.
Start running the underlayment at the edge of the roof, over the ice and water barrier and the dribble edge. Fasten it down with cap nails simply above the trickle edge. Place the cap nails each four to six creeps along the edge and then spread them out to around eight to ten crawls around the remainder of the underlayment.
Overlap the principal column with the following by at least six inches and follow the nailing pattern of the first with close nails at the edge and nails spread out additional towards the center. Proceed with the same pattern of overlapping and nailing until just beneath the roof's edge. Finish the underlayment by running the material over top of the edge with the goal that it drops down and cover the top edge of the two lines of underlayment on either side. Fasten both bottom edges of the underlayment down solidly and you've completed the installation.
5. Installing the New Roof
Follow all the manufacturer's roofing installation directions to get the new roof down in place. While laying a shingle roof, make sure to utilize starter shingles at the bottom and sides. Stagger each line to hold shingles back from leaking water. All the nails holding the shingles in place should be simply under the tar strip on the shingles and installed so that no heads are appearing.
While installing another metal roof, get everything square before starting and screw up the vertical edge, screwing into each of the edges rather than the flats. By screwing each vertical column before moving to the following the roof will go on flatter. Stay with quality screws that have wide elastic washers for maximum coverage and assurance. Screwing into the edges rather than the flats safeguards the screws from pooling water and will naturally get water far from the fasteners overall. We profoundly propose recruiting a local contractor while doing a metal roofing installation.
Other: The Valley Flashing Goes Underneath
Assuming you have any valleys on your home's roof, it's important to make sure that the valley flashing goes underneath the shingles or metal roofing. This flashing is intended to redirect water down your roof and into the drain framework assuming you have one. In the event that it's installed on top of the roofing water can get in behind it and down into your roof itself. That's the reason you want to safeguard it by installed it underneath the roofing. With the flashing underneath your roofing it is important to put a solid bead of roofing concrete over top of the edges of flashing down your roof. This safeguards against water exploding the side of the flashing and underneath the roofing and will assist with keeping your roof dry.
Choose What to Leave up to the Roofing Contractors
While you can probably finish all of these means yourself there are a few stages that are easier than others. For instance, tearing off an old roof is something that most any handyman can handle with sufficient opportunity and self discipline. In the event that you are searching for a way to save on your next roofing project, yet you would rather not do all of the more troublesome parts, you ought to think about handling the tear off and leaving the installation up to a roof contractor. This will save you huge and you will in any case have the reassurance of having your roof installed by a professional contractor. In the event that you really want to get an estimate of roof replacement costs, propose utilizing roof cost calculator so you have an idea of average roofing installation costs.
Now that you know all that is engaged with the undertaking you can choose if it is something that you want to attempt at all. Replacing a roof on a house is an exhaustive task and something that ought not be taken on gently. Make certain to plan for clear weather and move to work immediately with the goal that you can accomplish the task before rain has a chance to make its way into your home. While roofing, taking care of business rapidly is vital.


